Showing posts with label Chicken. Show all posts

Thursday, November 3, 2011

Indian spiced wings

Indian Spiced Wings:

2 lb chicken wings
3/4 tablespoon salt
1 teaspoon pepper
1/2 teaspoon turmeric powder (optional, it's for color)
1 1/2 tablespoons garam masala
5 cloves garlic, grated, diced, or mashed
1 inch piece ginger, diced or grated
1 cup plain yogurt

1. The night before, mix all of the ingredients together and marinate overnight. If you can, roast 2 tablespoons of whole garam masala spices in a pan for 2 minutes, then grind. However, you can also use ground garama masala and use that.

2. Place the top rack of the oven on the 2nd row to the top. Set the oven to broil. Broil turns on the heat only on the top of the oven and is used when you want to brown the top of whatever is cooking.  Broil the wings for about 15-20 minutes, then flip over and broil for another 10-15 minutes until the other side is browned and you have some blackened spots. Yum.

I also made crispy potatoes and roasted broccoli with my chicken wings. If you want to make those too, follow these directions.

Crispy potatoes:

5 potatoes
3 tablespoons olive oil
1 1/2 teaspoons salt
1/2 teaspoon pepper
1 teaspoon garlic powder
1 teaspoon dried rosemary (or 3/4 teaspoons fresh)
1/2 teaspoon dried oregano
1/2 teaspoon dried thyme

1. Cut your potatoes into thirds, lengthwise. Then take each slice, cut those into thirds, lengthwise, then slice into small cubes (about 1/2 inch).
2. Place the potato cubes into a baking pan or dish, add the oil and seasonings, and mix well.


Roasted broccoli:
1 head broccoli
1 1/2 - 2 tablespoons olive oil
1 teaspoon salt
1/2 teaspoon pepper

1. Cut the florets off of the stem and into uniform pieces, about 1 inch. You can also roast the stems too. Peel the thick skin off of the stem, it doesn't have to be perfect. Then cut the stems into 1/2 inch cubes.
2. Place the broccoli into a baking dish or pan. Add the oil and seasonings, and mix well.


Place the top rack on the 2nd row to the top, and the 2nd rack one row below that one. Heat oven to broil. Set the veggies on the top rack and the wings on the bottom rack. After 5 minutes, the broccoli should have some browned (but not blackened!) spots on it. Now place the broccoli on the bottom rack and the wings on the top rack next to the potatoes. Stir the potatoes around but keep them on the top rack.  After 15-20 minutes, the wings should be browned so flip the wings over. Stir the potatoes again and add more oil if they are looking dry. If you broil heats unevenly, you may have to rotate the pans so that the back doesn't burn before the front browns all the way. Broil for another 10-15 minutes until the wings are done.


Sunday, September 25, 2011

Quick Red Thai Curry

I just realized I had never posted how to make thai curry before and that is one of the simplest dishes I know! As a result I sadly do not have any pictures at the moment, but I will definitely add some soon.

Lien, you could easily recreate this and it wouldn't be a problem to season it exactly to your taste. You also don't have to worry about it being spicy if you don't add too much curry paste. Sound good?

All you need are as follows:

2 chicken breasts
1/2-1 onion sliced thinly
1 bell pepper
1 small head of broccoli or cauliflower cut into bit size pieces
1 can of coconut milk
2 teaspoons fish sauce
2 teaspoons brown sugar
2 teaspoons thai kitchen red curry paste
2 teaspoons thai kitchen roasted red chile sauce
1 package of tofu (optional)

1. Slice your chicken into bite size pieces and cook over medium heat until no more pink shows.

2. Add the can of coconut milk, fish sauce, brown sugar, curry paste and chile sauce. Mix until the curry paste is mixed in.  Season with the sugar/curry paste/fish sauce till it suits your tastes. I usually always add more fish sauce and curry paste than required but depends on the person. Bring to a boil.

3. Add your veggies and cook until the broccoli is cooked through, about 10 minutes over low heat. Add tofu at this point with your veggies if desired.

4. Serve over rice and enjoy!

Wednesday, April 27, 2011

Americanized Chinese Chicken. General Tso I think...

Because this sounded good and the picture of it in my food and wine was too good to pass up I decided to make the ultimate Americanized Chinese food this last weekend. I mean how much more Americanized can fried chicken with an Chinese-style sauce get. After making it though I would make a few changes and forward people from the frying part, -cough- Lien -cough.- Since your fridge story, I'm not sure I want your roommates coming home finding you cowering behind a pot lid as you toss chicken pieces into hot oil....>_<

Here is the recipe with my altered changes as well.

General Tso's Chicken:

2 chicken breasts (the original recipe calls for thighs, really it's your preference)
1/4 cup of corn starch
1/4 plus 1 tablespoon soy sauce
1 large egg white
1 1/2 teaspoon of toasted sesame oil
3/4 cup chicken broth
1 teaspoon chile garlic sauce
3 tablespoons of sugar
1 tablespoon of vegetable oil plus more for frying
2 tablespoons very finely chopped fresh ginger, I really just have kind of chunky ginger, it's tasty!
2 large garlic cloves, minced
4 scallions (green onions) thinly sliced

two heads of broccoli
Olive oil for drizzling
spices

Rice

1. Start the rice in the rice cooker

2. Preheat oven to 450 for the broccoli

3. Combine 1/4 cup of cornstarch plus 2 tablespoons, and 1 tablespoon of soy sauce, the egg white, and the sesame oil in a bowl and mix. Then cut up your chicken into bite size chunks. Add the chicken and coat in the marinade. Let it sit at room temp for 20 minutes.

4. Meanwhile cut up the broccoli. I like to long stemmy pieces. Put in a baking tin/glass pan. Then drizzle with olive oil and add salt and pepper. I also added garlic to it to make it more in theme with the dinner.

5. In a small bowl, like a soup bowl. Add the chicken broth, 1 talbespoon of cornstarch, chile garlic sauce, sugar, and remaining soy sauce. Whisk it together. Yes, whisk, it helps to break down the sugar.

6. In a small saucepan heat 1 tablespoon of vegetable oil. Add the ginger and the garlic and cook until fragrant, like a minute. The add the broth mixture and let it cook until thick and glossy. Now honestly this did not take 3 minutes when I made it and it never got very thick. So I took down the amount of chicken broth for this post, and hopefully that will help. It was still tasty though. If it still isn't thickening as much as you want, add a teaspoon of cornstarch and whisk it in.

7. Once the oven is preheated add the broccoli. It worked well to do this for me at this point, but you can always do it sooner. Just keep an eye on it for when it starts to get nice and browned. See roasted veggies recipe for more explicit details.

8. In a large skillet and I do mean large. I didn't use a big enough one. :-( But in a large skillet, heat about 1/4 inch of oil. The original recipe says for 1/2 inch, but really you could still fry it with 1/4 inch. Once hot and shimmering, Lien be careful. Then add the chicken SLOWLY. I tried using chopsticks for it, and am not an adept enough Asian...yep Asian now, and quickly realized I could slowly pour it in. But do be careful as the oil will most likely splatter. Cook the chicken until very browned and crisp, turning a couple times as well. It doesn't take long, like 4 minutes if that. Then drain your chicken on paper towels. Lien, use a slotted spoon or spatula for this as you dont need buckets of oil on your paper towels. After immediately add to your sauce with your scallions, stir until coated, about 30 seconds and then serve.

9. The rice and broccoli should be done as well at this point.

Yum!


Monday, July 26, 2010

Chicken and cheese quesadilla

Some time I'll have to try real Mexican food, but I do like Americanized Mexican food. Here is my recipe for chicken and cheese quesadillas. I tried to make my own taco seasoning out of the spices I have at home, but there are packets of taco seasoning in the supermarket that would be more convenient to use.

Seasoned chicken:

4 Tablespoons Taco Seasoning
1/2 cup water
juice of half a lemon
2 large chicken breasts

1. I think this is what I used in the taco seasoning: salt, pepper, chili powder, garlic powder, onion powder, and cumin. Otherwise, use a premixed packet.

2. Heat a pan with some oil on medium-high heat. Pat the chicken breasts dry with a paper towel. Fry the chicken, cooking both sides until the outside is browned.

3. Add the seasoning, water, and lemon juice. Reduce the heat to low and cover the pan. Cook for about 10 minutes, then flip the breasts over, and cook for about another 10 minutes.

4. Take out one piece of chicken at a time, and place on a cutting board or a bowl or a plate. Use two forks to shred the chicken. When you are done, add all of the shredded chicken back into the pan. Let the sauce simmer until it is thickened.


5. Then make your quesadilla! My method is to heat one tortilla on a pan on medium heat. When the tortilla is warm I flip it over. I add the chicken on one half and the cheese on the other, then fold the tortilla in half with a spatula. Then I press down on the quesadilla with the spatula. When one side starts getting brown, I flip if over. Then I use the spatula to cut the quesadilla into halves or quarters.


Tuesday, April 13, 2010

Pita, chicken and yogurt dip

I made this chicken before, when I tried making Chicken Tikka Masala. This time, I decided to cook the chicken and put it in a pita sandwich.

Yogurt-marinated chicken:
refer to Chicken Tikka Masala recipe.


The chicken, marinated overnight


Sliced up after cooking in the oven

I decided to make a yogurt dip for my sandwich.
Yogurt dip:
1 cup plain yogurt
1 small clove garlic, minced
1/4 onion, sliced thinly
1/2 small cucumber, cut in bite-sized pieces
salt and pepper

1. First, you have to drain the whey off of the yogurt to make it thicker. To make life easier, you could also buy Greek-style yogurt, and skip this step. I took a wire strainer and put it on top of a large bowl or pot. Then, I lined the strainer with a sheet of paper towel. Then, I put the yogurt in the strainer for about 3 hours.

2. After your yogurt has been strained, put the yogurt in a small bowl. Add the rest of the ingredients and let it sit in the fridge for at least a day to let the flavors mix.


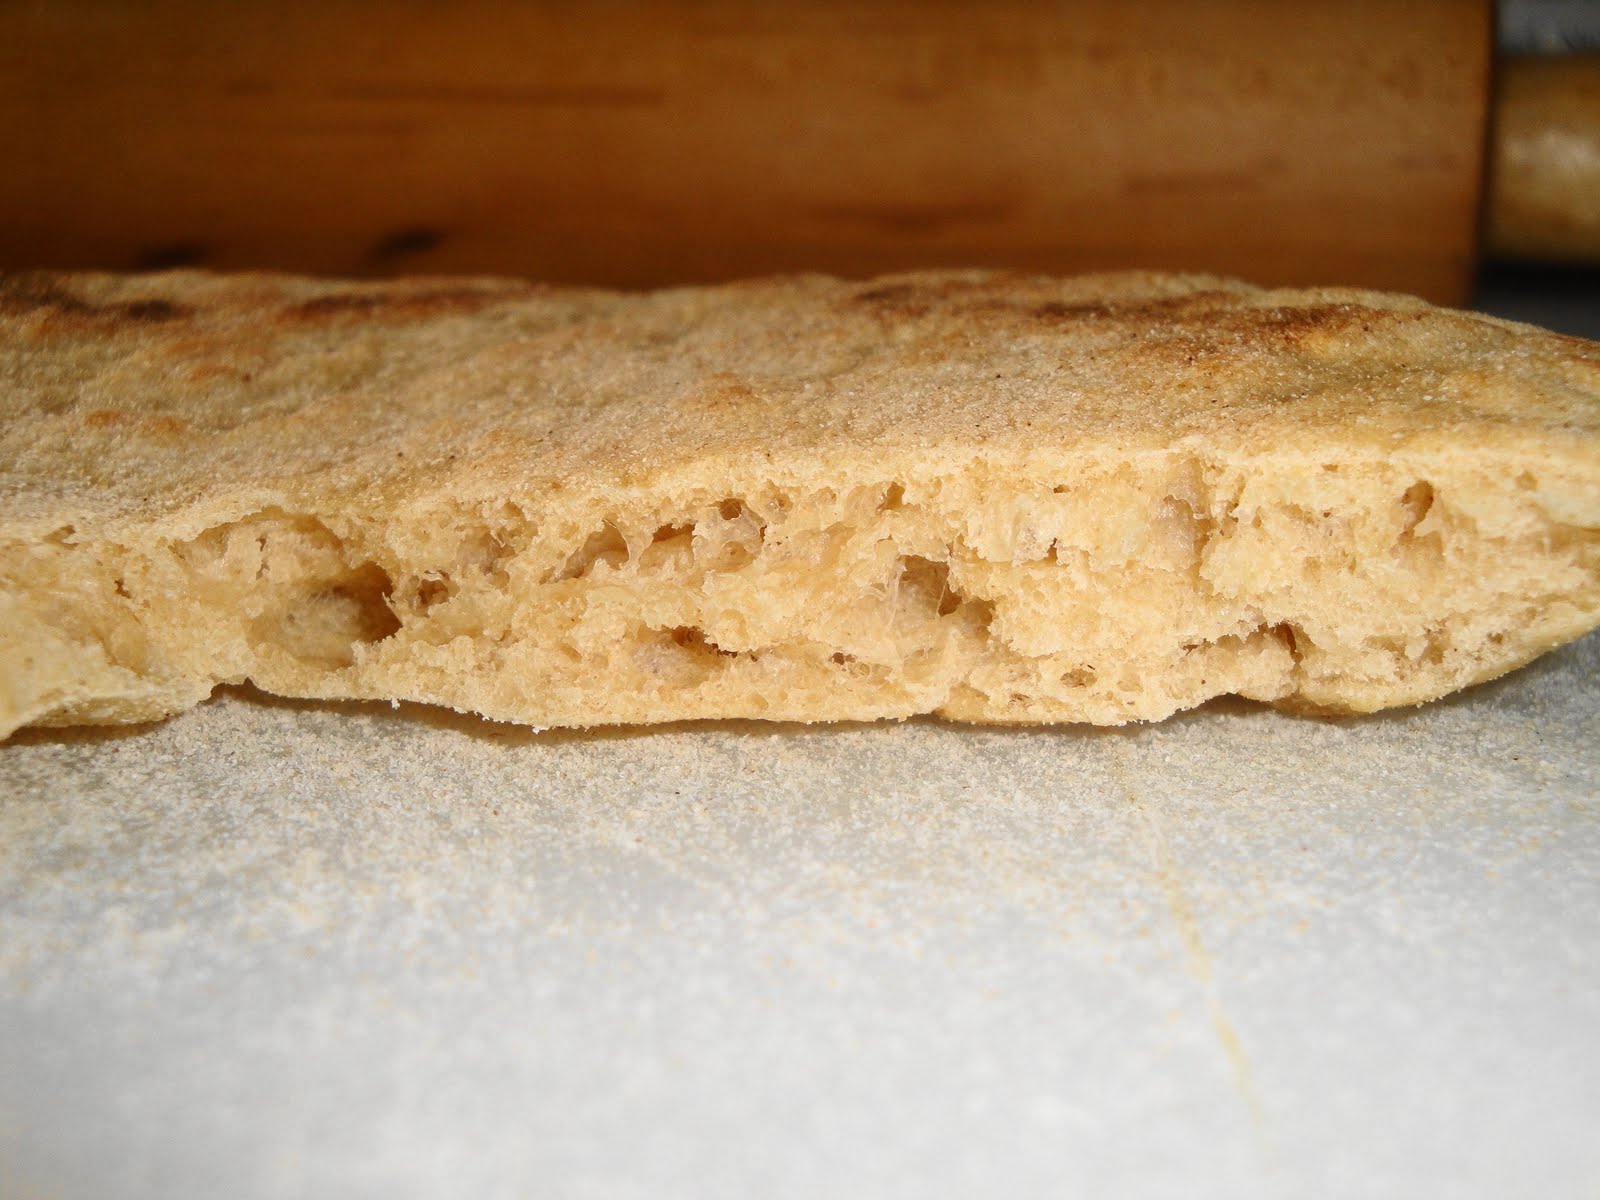
And here's how to make pita bread! I took this recipe out of a book called The Bread Bible by Beranbaum. I made a double batch.

Pita Bread: makes 8 6-inch pitas

3 cups + scant 1/4 cup unbleached, all-purpose flour
2 teaspoons salt
2 teaspoons instant yeast
2 tablespoons olive oil
1 1/4 cup water at room temperature

1. Combine all of the ingredients together in a large mixing bowl. With the stand mixer, mix on low for about 20 seconds, until the dough is moistened. Raise the speed to medium and knead for about 10 minutes. Alternatively, you can knead it by hand. The dough should clean the bowl, be soft and smooth, and just a little sticky to the touch.


Here's about how stretchy your dough should be.

2. Coat a large bowl in oil to keep the dough from sticking. Place the dough in the bowl and cover. Let the dough rise until it has doubled (about 1-2 hours on a hot day) or you can leave it overnight.

3. Next, you shape the dough. Make sure to cover the cutting board and your hands with oil, or else the dough will stick. Cut the dough into eight pieces. Roll each piece into a ball.

4. Press the balls flat with your hand. Let the dough rest for 20 minutes. This will make it easier to roll the dough out later. If you try to roll the dough now, the gluten will make it spring back into the original shape.


5. Use a rolling pin to shape each piece of dough to 1/4 inch thick. Make sure to use lots of flour to coat the board, the dough, and the rolling pin.


6. You can cook the dough on the stove. I used two frying pans to speed up my cooking time. Put a little bit of oil in your pan and heat on medium-high heat. Place one pita bread in the pan and cook for 20 seconds, then flip over. Continue to cook for about a minute, or until the dough balloons.

Wednesday, November 18, 2009

Tex-mex Soy-Sauce Chicken Recipe from Bon App.

Hey sorry this is going to be a brief post. I mostly need to type it up before I forget what I did. I didn't really know what I was going to get when I made this this week. It was just a "hmmm we have chicken, and spices, lets see what I can marinate the chicken in" recipe that allowed me to avoid going to the grocery store since Chris and I have so many dinner plans this week. As a result there aren't many pictures, but it turned out pretty good and is really easy.

Ingredients:
2 chicken breasts
2 large lemons
about 4 tablespoons of soy sauce
about 2 tablespoons of sugar
2 teaspoons of chili powder
1 teaspoon of Cayenne pepper (which I never know how to spell)
1 teaspoon of oregano (dried)
2 tablespoons of vegetable oil

1 small onion
1 medium bell pepper

1 half a head of cauliflower
1 cup of rice

Serves 4

Defrost the chicken.

In a medium size Tupperware, so one big enough to fit two chicken breasts in plus a good amount of sauce, mix all of the sauces and seasonings listed after the chicken. Taste the sauce and add more of what you think is missing. I thought it was a little sweet last time, so I think I might add a little more soy sauce next time. You need the sugar for the caramelization that happens when you cook the chicken so do not skimp on that. Add your two chicken breasts to your sauce concoction and then place the lid on the tupperware. Shake to coat the chicken in your marinade. Then let it sit in the fridge for at least an hour. The original recipe called for breasts with skin on them and for you to let it marinate over night...I didn't do that and it turned out fine. I also shook up the tupperware after about 30 minutes to coat the top of the chicken breasts again.

Then start your rice in a separate pot/rice cooker.

Take a medium size skillet and put it on over medium high heat to warm up.

Also chop up your cauliflower and steam it in a pot of water. See explanation for how to cook broccoli below. Cauliflower wont turn green obviously, so I usually poke it after the water starts to boil furiously to see if my fork slides in easily. That usually means it is done. So then I strain it. If after straining (i.e. holding the lid of the pot at an angle that keeps the cauliflower in the pot but allows the water to flow out into the sink. Don't burn yourself on the steam!) the cauliflower is still too hard for my taste I leave it in the pot with the lid on. It will "cook" a little longer like this.

The place your chicken and about 3/4 of your marinade in the skillet to cook. Let it cook for about 6 minutes on that side. Then turn and cook another 6 minutes on the other side. This was the perfect amount of time for one of my chicken breasts, but the other one was really thick and needed more like 8 minutes on each side. Just slice your chicken open to make sure it is white on the inside and not clear/pink at all. While your chicken cooks be sure to scoop up sauce in the skillet and pour it over the top of the chicken to make it get nice and caramelized.

While your chicken is cooking cut the onion and bell pepper in to strips. Like cut the onion in half and then do slices from that piece. Bell pepper, cut it into length-wise strips and then cut those in half. Once the chicken is done take it out with tongs/knife whatever, just keep the sauce in the pan. Then add your veggies to let them get soft and absorb some of the flavors as well as add some liquid to your sauce. About 3 minutes.

Then serve your chicken, veggies, and sauce over some rice. Makes for a great and quick meal.

I will add pics once they are uploaded to the computer.

Monday, October 26, 2009

Kung Pao Chicken (Rachel style)

Okay here is the updated version of Kung Pao chicken. Bare with me a little bit for the pictures since I need to upload them from my camera. But once I do that matzo ball soup and some awesome Vietnamese burgers will be coming too so the wait will be worth it. :)

Anyways, this is even easier than I remember it. So here are the numbers.

Ingredients:
2 tablespoons of soy sauce
1-1 1/2 tablespoons of sesame oil (depends on how oily/sesame-y you like it)
2 tablespoons of water
1 tablespoons of hoisin sauce
1 tablespoon of sugar
2 teaspoons of corn starch (this last time I used about 1/2 a teaspoon because we had barely any left but it still turned out great so don't worry too much about this it is mostly for the look and consistency.)
1-2 hot chilis like thai or jalapenos, chopped and seeded
2 chicken breasts
1/4 cup chopped green onions
1-2 stocks of celery chopped
handful of chopped carrots
broccoli or any other veggies you want to add
1/4 cup of dry roasted peanuts

So first mix all the ingredients up to the chicken together in a small bowl. Then I tasted it and added more of what I wanted, like if I wanted it saltier I added soy sauce, sweeter more sugar (mostly because I don't like the hoisin sauce our store had), diluted more water, etc. You want your sauce to be some what opaque so that way it will thicken when you cook it and be like the classic kung pao chicken sauce. If it still looks super clear then add a little more corn starch. I don't remember my exact proportions hence the estimates here, because I did exactly what I described. Also if you want it to be saucier then add more of the liquids and the corn starch. I like saucy things so that is what I did.

Then chop your chicken in to bite size cubes. Add the chicken to the bowl that your sauce was in, or vice versa whichever container is bigger, and let it sit for about 15 minutes. During this time chop your veggies. Again probably about bite size proportions, since after all you are eating this. Also the smaller the pieces the faster they cook so be warned.

Put a skillet on the stove over medium heat to warm up. Add the chicken and cook until you can no longer see the pink/it is not translucent. Then add your veggies and cook until they are cooked as you like (starting to get tender). Take off the stove and serve over rice. The whole cooking on the stove process should take about 15 minutes. Veggies cook slower when not immersed in water.

Panko Chicken with Broccoli and Rice

So on my way to Irvine for my Fulbright interview I decided I needed some magazines for the plane ride in case I got bored. Of course by magazines for entertainment I mean food magazines, what else would entertain me. This next recipe is adapted from and courtesy of Bon Appetite, the October 2009 issue I believe. It is a breaded chicken recipe and is really quick, easy and delicious. I have even made it twice now.

Ingredients:
2 chicken breasts
1/4 cup of chopped Italian Parsley (It is also called flat leafed parsley, and it is not the parsley that is scrunched up and looks like the garnish you get on plates at restaurants.)
2 teaspoons plus 2 tablespoons of Dijon mustard (I just used deli mustard.)
1 egg
1 cup of panko (Japanese bread crumbs) If I can find them in Missouri you can find them in CA.
2 tablespoons of olive oil
1 cup chicken broth
2 tablespoons of maple syrup
1/4 teaspoon salt
2 tablespoons butter

1 head of broccoli

1 cup of rice
2 cups water

Serves 4

This is random after so many recipes with chicken but I realized Tammy and I have not said this yet. If you are cooking with frozen chicken it is ideal to take the chicken out of the freezer around lunch and place in the sink to thaw. If you cannot do that the take it out the night before and place it in the refrigerator. Worst comes to worst you can place it in a bowl of warm water about an hour and a half before you want to cook. This just isn't ideal because it is not the healthiest way to thaw chicken because it breads bacteria more easily as well as thaws the chicken unevenly but I still do it all the time.

First take your chicken breasts and cut them in half horizontally, so the shorter way. Then place all of them in a big ziplock bag or taking turns put one in a smaller ziplock. Take a pot and smash them till they are about a 1/2 inch thick. Technically you should use a meat tenderizer (which is a wooden mallet) or a rolling pin but my father and I have both discovered the quick nature of a big heavy pot for this task. Its great at home because my dad puts the chicken on the floor to do it and then you hear this giant crash. Anyways, here is what the chicken should look like afterwords.


Then combine your "coating" for the chicken. That is take your chopped parsley, your egg, and the 2 teaspoons of mustard and combine it in a big bowl. Mix it so the egg is broken, like you are making scrambled eggs with this stuff. Then add the chicken and completely coat the pieces.


Then chop your broccoli into bite size pieces. There is a picture below. Place it in a pot and fill it with water so that way the broccoli is at least floating in the water, probably put at least 1 1/2 to 2 inches of water below the broccoli so that way when the water boils it does not boil off leaving the broccoli on the bottom of the pan. You don't want a ton of water in the pot though otherwise it takes forever to boil. Put on the stove over medium high heat.


Now is also a good time to start your rice since that takes on average about 15 minutes to cook. If boiling on the stove then you need 1 cup of rice and two cups of water. A nice thing to remember is that the never fail ratio for rice is 1:2 with the rice on the left and the water on the right. Place that in a pot and put on medium high-high heat. High heat means turn it down once it starts to boil.

Then place the 2 tablespoons of olive oil in a large skillet over medium high heat. While the oil heat bread your chicken. Take in out of the bowl one at a time and place in the Japanese bread crumbs, the panko. Turn over so that way as much of the panko as possible sticks to it. It is easy to do this on a large plate. You probably cant do this to all of the chicken at once unless you move the chicken some where else. So once you have fit as much chicken as possible and covered it with panko on that plate put that chicken in your skillet. The oil should be hot now. Cook the chicken about 4 minutes on each side or until cooked through. You want the panko to be nice and golden on each side. Once the chicken pieces are cooked through remove from the heat and place them on another plate. Repeat with the rest of the chicken.


Then check your broccoli and rice. Turn the rice down if it is starting to foam to the top. Stir it as well to make sure the rice is not sticking to the bottom of the pan. The broccoli should cook about 5 minutes from the time the water starts to boil. This way it will still be crunchy. A fork should go easily in it but the broccoli should not be falling apart or mushy, granted you can cook it longer if you like it like that. Once it is cooked to your liking, strain it with a strainer or by using the pots lid to keep the broccoli in the pot while pouring out the water. This is what my broccoli looked like.


Also while your chicken is still cooking combine the chicken broth, syrup, salt, and the rest of the mustard in a small bowl or a measuring cup and wisk it till the mustard is no longer in clumps. Once the chicken is all cooked. Add the syrup mixture to the pan.


Once the mixture has reduced to about 3/4 of a cup, so basically cook it for about 4 -5 minutes so some of the liquid cooks off and it gets thicker, add 2 tablespoons of butter. When the butter is melted pour the sauce into a small bowl and the chicken is ready. Check the rice as it should be done. Keep an eye on it from once the first batch of chicken is done. Some people like wet rice and some people like completely dry rice. I like to cook mine until it is still slightly wet and then take it off the heat, stir it, and place the lid back on. This way the rice still cooks a little since it is in a hot pot, but the steam helps to get the stuck rice off the bottom of the pan. Once everything is done place on plates and eat.

Here we go:


Wednesday, September 2, 2009

Rachel's Made up Chicken and Potatoes

Well, Katie and I decided to have dinner with Chris and Sean one night this summer since Chris was coming to visit before he went off to Japan with Sean and Kevin. So on Katie and mine's traditional "date night" (Wednesday) I decided to cook since we still had left overs from our 4th of July bbq. And this recipe is pretty much what ensued after I got the ingredients to make something completely different. :D

Potatoes:
2 brown russet potatoes (or since I don't know what kind of potatoes you will have access to Lien, it does not really matter what kind of potatoes they are just get as many as you would like to eat)
1 teaspoon minced garlic (3-4 cloves whole garlic)
4 teaspoons olive oil
seasonings (I used Cajun seasoning this time, carne asada seasoning the last time, and Lien I know you will just want salt and pepper)

Chicken:
1 head of garlic
3 teaspoons olive oil
1 large yellow onion
4 teaspoons of olive oil
2-3 chicken breasts
salt and pepper
1/3 cup chicken broth
1/4 cup cream
seasoning as you like (I used bay leave, chili powder, pepper corns, and parsley this time)

Vegetable of your choice

Preheat the oven to 450 degrees. Take your head of garlic and chop off the top of it, so that you are starting see the tops of the raw garlic (the ones in the middle that is). Then place in the center of a square of aluminum foil and begin to bring the foil up around the garlic. Then add the 3 teaspoons of olive oil. Crumple up the foil at the top so you have foil covered head of garlic. Place in the oven for about 30-40 minutes. You can tell the garlic is ready when you can really smell it and also the tops of the garlic cloves are rather squishy when you touch them. It will look like this:


Then slice the potatoes into about 1 inch or a little smaller cubes and place into a baking pan.


Add the 4 teaspoons of olive oil to the potatoes and then your seasoning choice. Then mix it around with your hands to coat the potatoes and place in the oven (still at 450) for about 20-30 minutes, or until the potatoes can be pierced with a fork quite easily. The garlic should also be out of the oven by now. Potatoes in the oven will look like :


Take the garlic out of their skins and place in a pan with another 4 teaspoons of olive oil. Turn the skillet on to medium heat to get the flavors to start blending. Here is the garlic out of its skins and what the skins will look like after you've taken the garlic out (you don't want to skin Lien!).


While the garlic flavors are mingling slice the onion into strips and add to the skillet.


Cook the onions until they are starting to get clear. Then take the chicken and slice it in half or smaller, as smaller pieces will cook faster. Place the chicken in the skillet with the onions. Then season the top side of the chicken with salt and pepper and cook until the bottoms begin to brown. About 5 minutes at least.


Cook the chicken for another 5 minutes on its other side so both sides are browned. Lastly add the chicken broth, cream, and other seasonings. Then cook for another 10 minutes (this is with the chicken cut in halves) or until the chicken is full cooked through (so not pink or clearish in the middle).


Then take everything and serve. (oh yeah make your veggies too!)


Enjoy!