Monday, April 26, 2010

Ragu

So I was watching TV and I saw a recipe for ragu. I've never made ragu before, but it looked interesting and look good on TV. This recipe is complicated and long, which is why I wanted to try it out. In the end, I thought it tasted good but was not worth the effort, haha.

Ragu: serves 10-12
From foodnetwork.com

6 ounces bacon, cut into 1-inch pieces (About 5 strips)
2 onions, finely chopped
1 1/2 teaspoons salt
1/2 teaspoon pepper
3 whole cloves
1 whole star anise
3 stalks celery, finely chopped
3 cloves garlic, minced
2 cloves garlic, sliced
8 ounces ground beef
8 ounces ground pork
1 1/4 cups white wine
3/4 cup evaporated milk (not to be confused with condensed milk, the sweet stuff)
3 cups beef broth
1 ounce dried mushroom, chopped
56 ounces diced tomatoes
1 tablespoon oregano
2 teaspoons dried basil
2 teaspoons dried majoram
2 tablespoons tomato paste
1 tablespoon ketchup
1 teaspoon Worchestershire sauces
1 1/3 cups parmesean cheese


1. Cook the bacon on medium low in a big pot. Remove the bacon from the pot and add the onions, salt and pepper. Cook until the onions are carmelized, about 30 minutes. Place the anise and cloves in a spice ball, cheesecloth, or cotton sachet, and add to the pot.


2. Add the celery and garlic, and cook until the celery is soft, about 20 minutes. Remove the spices.


3. Meanwhile, brown the meat in a separate pan. Cook the meat in batches otherwise your meat might get soggy. Drain as much of the oil as you can, and add the meat to the big pot. Add 1/2 cup white wine to the pan you cooked the meat in and scrape any brown bits off. Add the wine/scrapings into the pot.

4. Add 1/2 cup white wine, the chopped mushroom, evaporated milk, and beef broth. Reduce the heat to low and let it simmer for a total of three hours.


So, at this point, something happened to my sauce. It seems like the evaporated milk curdled, because I saw white flecks in there. Other people who have tried out this recipe said the same thing. So in the end the sauce didn't look appetizing but it tasted okay.

5. While the big pot is simmering, heat oil in the other pan you were using or a medium pot. Add in the sliced garlic and cook for a few seconds. Add the canned chopped tomatoes and spices. Let the water cook off of the tomatoes, about 30 minutes.

6. Add 1/4 cup white wine, the tomato paste, ketchup, and Worchestershire sauce. Cook the tomatoes for an additional 25 minutes to caramelize the sugars. Stir occasionally. Then add the tomatoes to the big pot.


Serve with bread or spaghetti!

Another cake

So my mom's birthday was on 4/20 (she's 51 now). We celebrated her birthday the weekend before the actual day because my sisters were in town. I decided to try making the Asian Fruit Basket Cake again. I used a different cake recipe from http://www.kingarthurflour.com/recipes/golden-layer-cakebr-recipe. I think I overbaked it a little bit, because the cake was a little dry. It tasted really good the next day though!

My mom always lets my cousins blow out the candles. It's hilarious to watch my youngest cousin Dylan because he sways side to side when people sing the Happy Birthday song.


Lots of layers... I got help from Lionel and my sisters with decorating. I baked the cake in two round pans. Lionel sliced the cakes into two layers each. The strawberries in the filling are chopped into small cubes and mixed with whipped cream. Then we just built the cake, frosted the outside with more whipped cream, and topped with strawberries.

Salmon teriyaki

Salmon Teriyaki has and will probably always be one of my favorite things that my mom cooks. This has always been for as long as I can remember one of those iconic Sunday night dinners at home where my mom magically whips the sauce together hours before dinner and lets the salmon steak sit for a couple hours before my dad pops them on the grill. Then she will microwave the rest of the marinade to have as a sauce (mostly because she's got sides cooking on every burner of the stove). My dad and I inevitably end up licking our plates with my mom yelling at one of us. Now my brother eats it too, thankfully. When he was younger this was the recipe that fooled him into thinking we were eating steak, something he had just learned to like. We all heavily insisted that he was wrong but he threw a fit until he got to have some. Immediately his face was all askew in disgust and that was the end of salmon and steak for him for a long long time. I don't marinate my salmon as long as my mom does, nor am I quite content with my sauce, but in the end it is still finger-licking good. I will continue to work on it over the months, but at least I know that I can easily have a little piece of home any night of the week, which is quite a relief when work still gives me it own wonderful sort of knot in my stomach. I didn't even have any ginger tonight or a grill and this dish still turned out amazing.

Ingredients:
1 lb salmon fillet (or salmon steaks)
1/3 c. soy sauce
2 tablespoons rice wine vinegar
2 1/2 tablespoons cider vinegar
2 tablespoons sugar
1 tablespoon minced ginger
1 teaspoon minced garlic

Serve with rice and veggies (that is the simplest, naturally in my mental image of home we always have much more extravagant sides).

Take all of the ingredients except the salmon, and mix them together in a small sauce pan over medium heat. Cook until the sugar dissolves stirring occasionally. Then let the mixture bubble until it is reduced to about a half of a cup. Now I know Lien, you are probably thinking "How in the world do I know what half a cup looks like." So really you just want to let it cook long enough so it your sauce is starting, I repeat, STARTING to get thicker and more like a syrup. You want it to be like this so you know all the flavors have mingled together. Turn off the heat and let this cool until it gets down to room temperature again. You can do that by either sticking the pot in a bowl with ice, sticking it in the fridge, or just letting it cool down. It kind of depends on what kind of a rush you are in. The ice will work the fastest. Once it is cooled pour it over your salmon and make sure it coats all the sides of the fish. Let it stand at room temperature for at least 15 minutes. I did it for about 30-40 minutes tonight and that was great.

Then put about 1 tablespoon of oil in a skillet and let it heat up over medium high heat. You want the oil to start to shimmer. Put your salmon in the pan. Reserve the marinade in the dish you had the salmon in for later. Let the fish cook for 2 and 1/2 minutes on each side. This should be just perfect, but you can check your salmon by cutting it where it is the thickest. If that part of the salmon is just barely translucent or opaque still, then the rest of your salmon should be perfect, so start taking it off with the thinest piece first.

Pour off the oil into a glass jar for proper disposal. Oil should never go down the drain. Then put the marinade in the pan and let it heat up. You will want to reduce it again, so it gets to be more the consistency of maple syrup. Like this all the garlic and ginger pieces will get nice and caramelized and the sauce will be perfect for pouring over your salmon.

Once your sauce is to a consistency of your liking, drizzle it over the salmon steaks. Then enjoy!


Tuesday, April 13, 2010

Pita, chicken and yogurt dip

I made this chicken before, when I tried making Chicken Tikka Masala. This time, I decided to cook the chicken and put it in a pita sandwich.

Yogurt-marinated chicken:
refer to Chicken Tikka Masala recipe.


The chicken, marinated overnight


Sliced up after cooking in the oven

I decided to make a yogurt dip for my sandwich.
Yogurt dip:
1 cup plain yogurt
1 small clove garlic, minced
1/4 onion, sliced thinly
1/2 small cucumber, cut in bite-sized pieces
salt and pepper

1. First, you have to drain the whey off of the yogurt to make it thicker. To make life easier, you could also buy Greek-style yogurt, and skip this step. I took a wire strainer and put it on top of a large bowl or pot. Then, I lined the strainer with a sheet of paper towel. Then, I put the yogurt in the strainer for about 3 hours.

2. After your yogurt has been strained, put the yogurt in a small bowl. Add the rest of the ingredients and let it sit in the fridge for at least a day to let the flavors mix.


And here's how to make pita bread! I took this recipe out of a book called The Bread Bible by Beranbaum. I made a double batch.

Pita Bread: makes 8 6-inch pitas

3 cups + scant 1/4 cup unbleached, all-purpose flour
2 teaspoons salt
2 teaspoons instant yeast
2 tablespoons olive oil
1 1/4 cup water at room temperature

1. Combine all of the ingredients together in a large mixing bowl. With the stand mixer, mix on low for about 20 seconds, until the dough is moistened. Raise the speed to medium and knead for about 10 minutes. Alternatively, you can knead it by hand. The dough should clean the bowl, be soft and smooth, and just a little sticky to the touch.


Here's about how stretchy your dough should be.

2. Coat a large bowl in oil to keep the dough from sticking. Place the dough in the bowl and cover. Let the dough rise until it has doubled (about 1-2 hours on a hot day) or you can leave it overnight.

3. Next, you shape the dough. Make sure to cover the cutting board and your hands with oil, or else the dough will stick. Cut the dough into eight pieces. Roll each piece into a ball.

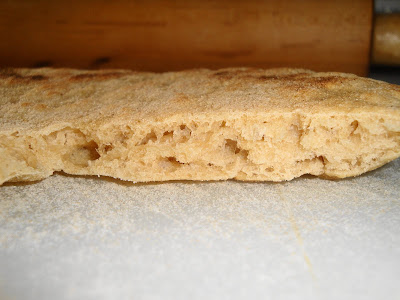
4. Press the balls flat with your hand. Let the dough rest for 20 minutes. This will make it easier to roll the dough out later. If you try to roll the dough now, the gluten will make it spring back into the original shape.


5. Use a rolling pin to shape each piece of dough to 1/4 inch thick. Make sure to use lots of flour to coat the board, the dough, and the rolling pin.


6. You can cook the dough on the stove. I used two frying pans to speed up my cooking time. Put a little bit of oil in your pan and heat on medium-high heat. Place one pita bread in the pan and cook for 20 seconds, then flip over. Continue to cook for about a minute, or until the dough balloons.

Saturday, April 10, 2010

Lemon Chicken With Spinach

So I wanted to try something new this last week for dinner, but I was also searching for something simple. This is what I decided on and it was delicious! I again got the recipe from Food and Wine but I altered it a bit since I was only making a half recipe, Chris doesn't like olives, and I didn't realize I didn't have capers until the night I made it. But in the end it didn't matter and I was in love with the quick and easy preserved lemons I made.

Ingredients:
2 lemons
1 bag of spinach
1 - 2 tablespoons of breadcrumbs
3 tablespoons of olive oil
2 chicken breasts
1 cup of chicken broth
handful of sun-dried tomatoes
1 bunch of parsley
3 tablespoons of butter
salt and pepper

First preheat your oven to 350 degrees. Slice your lemon in about 1/4 inch slices, so you have lemon rounds. Then get a little saucer of olive oil and dip/splash each lemon slice with olive oil so it has the oil on both sides. Place on a parchment paper - lined baking sheet and sprinkle with salt and pepper. Then bake for about 20 minutes or until the edges of the lemon are starting to brown. They will look like this when done.


Meanwhile, pour the bag of spinach into a large skillet. Saute over high heat until just wilted. The bag will basically take up the WHOLE skillet and then shrink down to about a cup once cooked. I think when I did it I slightly over cooked my spinach a bit, so you dont want it to be completely crumpled up yet. Still very tasty. then remove the spinach from the skillet and add 1 tablespoon of oil and the bread crumbs. Saute until the breadcrumbs are browned and then add the spinach again. Stir to mix for about a minute and remove from heat.


In another skillet or in the same skillet after you have removed the spinach, put the remaining oil and heat over high heat. The place the two chicken breast in, with salt and pepper on both sides, and cook each until browned on both sides, three minutes per side. Then add the chicken broth and sun-dried tomatoes and parsley. Bring it to a boil and let it cook for another 5 minutes. Add the lemons and the butter. Cook until the butter is melted and the chicken is cooked through about another minute.


Take it off the stove, and put the chicken over the spinach. Spoon some of the sauce on as well. Then enjoy! I LOVED the lemons. :)


Thursday, April 8, 2010

Matzo Ball Soup

Now the post I know you have all been waiting for... Okay, Diane has been waiting for this since I think Freshman year of college. Again no pictures. I've been too lazy since I don't want to have to move a bunch of stuff from this super old computer to whatever new computer/hard drive I get soon. In the meantime here is the recipe. Hopefully while I am home I can learn to make the spectacular matzo balls that my mom has figured out how to make. And Diane you will want to add probably 10 times the amount of pepper I have here...basically spill it in the soup like I did that one time.

Ingredients:
1 rotisserie chicken
6-8 cups of water, depends on how big of a pot you use. Will explain later.
1 teaspoon oregano
1/2 teaspoon salt
1 teaspoon ground pepper
4-6 medium carrots chopped
4-6 medium sticks of celery chopped
quarter size amount of spaghetti or angel hair pasta (torn into about one inch bits)

1 cup of matzo meal
+ the directions on the CAN of Manischewitz matzo meal (Do not buy the pre-made individual packets, not the right taste/consistency.)
Use VEGETABLE oil and NOT Olive oil. The matzo balls just don't taste right then.

Time: 3 hours+ for flavorful soup

Place your rotisserie chicken skin and any drippings and all into your largest pot. If it the chicken has rope or plastic keeping its legs together take it off. Then fill up the pot with water to about one to two inches from the top. You will be taking the chicken bones out in the end so that will make the height of the water/soup go down, and your pot wont over flow once you get everything else in. The place your pot on the stove and bring it to a boil. This means you can place the stove on high, medium, or even low heat. The point is that once it begins to boil you should turn the stove down to low so your food does not boil over/over cook. Once you have your chicken boiling in water, turn the stove to low, and then continue to cook for an hour. Taste the broth and add the salt, pepper, and oregano. Then continue to cook for another 45 minutes. Add more salt or pepper to your own taste as this "water" will be your soup stock.

Chop your veggies while the stock is cooking. Then you can just add them later when needed.

Once the stock has cooked for a while, to get all of the juices out of the chicken and into the water, take the chicken and all pieces/bones it has split into out of the pot and into a big bowl. Then follow the instructions on the can of Manischewitz matzo meal and place your matzo in the fridge to cool/set. I usually add less salt than the can calls for and then taste it after I add my soup stock to it to decide how much salt I want to add. And yes I know there is raw egg in this. I am not advocating that you try food with raw egg in it if you do not feel comfortable. If this isn't an issue for you it isn't a bad thing to try it since you don't want you matzo balls to be plain.

After you put the matzo dough in the fridge add your veggies to the soup stock and bring it back to a simmer. As you are letting the pot simmer, tear all of the chicken meat off and toss it back into the soup. Once your soup is at a boil again, your matzo balls should be ready to make in the fridge. They are supposed to sit in the fridge for at least 20 minutes, and I know some Jewish women leave them there for a whole night. Take out your matzo meal though from the fridge and wet your hands with lots of water. This helps to keep the matzo dough from sticking to your hands as you make your balls. Next take about a tablespoon size scoop of matzo dough and make it into a ball in your hand and then plop it in the soup. I try to get ball shaped sizes of matzo dough when I get it from the dough because if compress it too much to make a perfect ball shape then your matzo balls end up really dense, whereas I prefer them to be as light and fluffy as possible. Once you have made all of your matzo balls and placed them in the soup, cover your boiling soup and place it on low. You will need to let the matzo balls cook in the broth for at least 40 minutes, so use that count down as your timer so to speak for when to put in the noodles. If using angel hair pasta like I have listed then you will place your broken up pieces in to the soup with about 4 minutes left on your matzo ball timer. Once the noodles are done your soup is good to go! Merely scoop into bowls and let your guests season it with salt and pepper as they wish since everyone prefers a different amount -cough- Diane -cough-.

I hope you all enjoy the soup. Once I find the pictures on my external drive I will add them to this.

Forbidden Fried Rice


I know Tammy already posted a Fried Rice recipe on our blog but this one was recommended to me by my mom, and doesn't the title just sound like fun! You even use Forbidden rice, and it has lots of delicious things in it like roasted garlic and bacon making it even more of a delicacy. I can't wait to make it again. The recipe is from Food and Wine magazine so they completely deserve all the credit. I am just going to add my own tweaks to it and my mom's insights as well.

Ingredients:
1 head of garlic with the cloves peeled
2 tablespoons of vegetable oil
2 cups black rice
2 cups of water
1/4 lean bacon, chopped
1 medium onion, diced
1/4 cup soy sause
salt and pepper
4 scallions, chopped

First you make your garlic. You need to preheat the oven to 350 and place your garlic cloves in foil so you can wrap them up with the vegetable oil. Bake the garlic for about an hour, it depends on the oven. You want the garlic to be soft to the touch and nice and caramelized. Now food and wine says it needs to sit over night, but my mom has decided that that part does not really make a difference.


Next cover the rice with the water and bring it all to a boil. You are going to cook it over LOW heat for about 20 minutes. Remember to keep and eye on it because the rice is done once all the water is absorbed and the rice is just tender, so like al dente pasta. You will take the pot off the stove and let the rice stand for 10 more minutes. The following step is optional since my mom has discovered it doesn't make much of a difference. Food and Wine says you should spread the rice on a baking sheet and then let it cool to room temperature, then cover and refrigerate over night.


Then cook your bacon. Bacon is one of the simplest meat products to cook because you really just put it in a skillet and let it do its thing. Once it starts to look like it is slightly underdone from the way you like it, that is when you take it off. I know that sounds really weird but it is almost as if the bacon cooks a little bit longer between taking it out and cooling off so that it gets to be just the way you like it. Use a slotted spoon or spatula to take it off and then place the bacon on a paper towel to get off some of the grease.


Pour off the bacon grease. NOT DOWN THE DRAIN! That is bad for the sink. Get a little glass jar you dont need any more to keep the grease in so you can properly dispose of it once it is full. Then add the 2 tablespoons of oil. Add your diced onion and cook over medium heat. Stir the onions every now and then until they are nice and soft, like they are starting to caramelize. Food and Wine says about 6 minutes. In reality it depends on the stove. Then add the bacon, garlic, rice, and stir fry until everything is heated through, which takes a couple minutes. Add in the soy sauce and season with salt and pepper. Toss the scallions on top before serving and it is all done.


Yummy delicious fattening goodness. :D

Roasted Veggies


So I am annoyed as crap with work at the moment, thus making me blog....funny how that works you know. Anyways, I am sorry I haven't posted any of my food in ages. Work has had me running in circles and at the moment I am getting sick of justifying the longer hours and random work schedule to myself, so I wanted to blog about some of the fun things I have been making after my long days at work to make myself feel better.

To start we have Roasted Veggies. This is one of the simplest and most delicious ways I think you can cook vegetables and the best part is that you can use this recipe with virtually any type of veggie you want.

Ingredients:

1 lb Broccoli (or cauliflower or whatever you choose)
1/2 teaspoon salt
1 1/2 tablespoon olive oil
1/2 teaspoon pepper or spices (something for excitement!)

Preheat your oven to 450 degrees. Chop your broccoli how you would like to eat it, that is if you want long spears cut it up like that or if you want bite size pieces cut it up like that. I always cut my broccoli kind of randomly because I think it makes roasted broccoli look better and makes it more fun to eat. Put your broccoli in an appropriately fitting baking pan. I usually use my 8X8 glass Pyrex dish merely because it almost always fits in there. Then toss the remaining ingredients over the broccoli, and toss the veggies to get the olive oil and seasoning to coat the veggies.

Put the pan in the oven and cook for about 15 minutes or until it is your desired tenderness. You should start to see the broccoli flowers start to brown and that is a good sign it is done. I usually mix up the veggies half way through cooking just to keep an eye on them and get them evenly seasoned and browned.

Here is what you get in the end!